Quick NavigationThe goal of this postGet the Azure Stack Development KitDownload the Azure Stack Development KitModify CloudBuilder.vhdx for Nested Hyper-VPrepare the Hyper-V HostCreating a NAT SwitchPrepare the AzureStack VMCreate the AzureStack VMAdd CloudBuilder.vhdx BootdiskModify Processor CountAdd four Data VHDXDisabling Time SyncronisationChange Automatic Stop Action (optional)Enable Nested VirtualizationEnable Mac Address SpoofingChange VM Boot OrderChange Settings in the AzureStack VM Change the Network SettingsModify the VM Name (optional)Modify the IE Security SettingsInstalling Azure Stack Collect Deployment ParameterAzure Active Directory Tenant NameTime Server IP AddressDeploy with the PowerShell ScriptIn Case of ErrorsCheck Installation
The goal of this post
In this Post I want to give you a step by step guide how you can install the Azure Stack Development Kit in a Hyper-V Nested virtual machine. The deployment is tested with the Version of Azure Stack Development Kit that was available in October 2017 (Release Build Version 20170928.3) and in November 2017 (Release Build Version 20171020.1).
Don’t get me wrong! I think the best way to experience the Azure Stack Development Kit is by installing it on a decent hardware box but maybe you don’t have one handy or don’t have the budget for a new one. In this case this is a solution for you.
Get the Azure Stack Development Kit
Download the Azure Stack Development Kit
You will find the download link for the Azure Stack Development Kit (at least the time of writing of this post) at: https://azure.microsoft.com/en-us/overview/azure-stack/development-kit/
After downloading and starting the AzureStackDownloader.exe and filling in the mask below the Download starts.
https://azure.microsoft.com/en-us/overview/azure-stack/development-kit/
When the download has finished you find approximately 11 GB of files in the specified Download Directory or 18 GB depending if you selected to also downloaded the Windows Server 2016 evaluation version (ISO file)

Double click on AzureStackDevelopmentKit.exe to extract the Azure Stack Development Kit from the highly compressed archive. Click through the Wizard and after the extraction process finished you get the „CloudBuilder.vhdx“ virtual disk to work with.

Modify CloudBuilder.vhdx for Nested Hyper-V
To deploy the Azure Stack Development Kit in a Nested Hyper-V VM we must make some changes to the Build system in it. To do that we right-click on the VHDX and choose „Mount“.
Find the Drive where it is mounted and navigate to the Directory <MountDrive>:/CloudDeployment/NuGetStore.
Here you find the file Microsoft.AzureStack.Solution.Deploy.CloudDeployment.1.0.598.8.nupkg which we have to modify. To do that copy it to a folder, rename the extension from „.nupkg“ to „.zip“ and then extract it.
Now we must change two files:
- X:/content/Roles/PhysicalMachines/Tests/BareMetal.Tests.ps1
- X:/content/Configuration/Roles/Infrastructure/BareMetal/OneNodeRole.xml
In the BareMetal.Test.ps1 we must disable the check if the Azure Stack Host is a Virtual Machine. The easiest way to do that is by changing the tree places in the script where the check is done. So replace the line:
- if (-not $isVirtualizedDeployment)
with the line
- if ($isVirtualizedDeployment)
tree times!
The next step is only requiredif you are low on diskspace. Then we should modify the file „OneNodeRole.xml“ to lower the disk requirements of the deployment.
Open „OneNodeRole.xml“ and find the following entries
<MinimumSizeOfDataDisksGB>135</MinimumSizeOfDataDisksGB> <MinimumSizeOfSystemDiskGB>180</MinimumSizeOfSystemDiskGB>and change them to
<MinimumSizeOfDataDisksGB>120</MinimumSizeOfDataDisksGB> <MinimumSizeOfSystemDiskGB>120</MinimumSizeOfSystemDiskGB>
. By setting them to a smaler size you will be able to deploy to smaller disk.
After editing the two files, copy them back into the „Microsoft.AzureStack.Solution.Deploy.CloudDeployment.1.0.598.8.zip„ archive. Rename the extension form „.zip“ back to „.nupkg“ and copy the file back into the „CloudBuilder.vhdx„. In the last step you unmount the „CloudBuilder.vhdx“ by right clicking on the Drive letter where the VHDX is mounted and then select „Eject“.
if (-not $isVirtualizedDeployment)
Prepare the Hyper-V Host
Creating a NAT Switch
The best way to connect your Azure Stack virtual machine with the outside world is to create a NAT Switch on the Hyper-V Host. You do that by executing the following PowerShell script in an PowerShell or PowerShell ISE with Administrative Rights:
$SwitchTest = Get-VMSwitch -Name „NATSwitch“ -ErrorAction SilentlyContinue if($SwitchTest -eq $null) { New-VMSwitch -Name „NATSwitch“ -SwitchType Internal -Verbose $NIC = Get-NetAdapter | where Name -like „vEthernet*(NATSwitch)“ New-NetIPAddress -IPAddress 172.16.0.1 -PrefixLength 24 -InterfaceIndex $NIC.ifIndex New-NetNat -Name „NatSwitch“ -InternalIPInterfaceAddressPrefix „172.16.0.0/24“ -Verbose}
The Script will create an Internal Switch, give the Internal Adapter „vEthernet (NATSwitch)“ the IPv4 Address „172.16.0.1“ and change the Switch to an NAT Switch.
Prepare the AzureStack VM
Create the AzureStack VM
Now it is time to create our VM. If you have modified the „OneNodeRole.xml“ as suggested you need a VM with 12 Cores, 96GB of RAM, one OS Disk with 120GB and four Data Disks with 120 GB each. To create such a VM you open „Hyper-V Manager“ on your Hyper-V Host and start the Virtual Machine Wizard by clicking on „New ->“ and then „Virtual Machine…“.
Specify a Name for the VM (I choose in this example „AzureStackDevKit“) and check the „Store the virtual machine in a different location“ checkbox

choose VM Generation 2

specify at least 96 GB of RAM (I use in the example 100 GB)

connect the NIC to the „NATSwitch“

choose „Attach a virtual hard disk later“

and press „Finish“.
Add CloudBuilder.vhdx Bootdisk
Now open an Windows Explorer and navigate to the VM Directory (in my example C:/ClusterStorage/DaONS2D2/AzureStackDevKit) and create a „Virtual Hard Disks“ Directory. Copy the modified „CloudBuild.vhdx“ into the “Virtual Hard Disks“ Directory.

Open the „VM settings“ in „Hyper-V Manager“ and add the „CloudBuilder.vhdx“ Disk to the VM. To do so choose „SCSI Controller“, „Hard Disk“ and press the „Add“ button.

Choose „Browse…“ and navigate to the folder where you copied the „CloudBuilder.vhdx„. Select it and then click the „Apply“ button.

Modify Processor Count
Now we modify the Processor count. To do so click in the still open VM Settings Windows on „Processor“ and enter 12 in the „Number of virtual processors:“ field. Then click the „Apply“ Button.

Add four Data VHDX
In the next step we add four Data Disks to the VM. To do so click in the VM Settings on the „SCSI Controller“ and choose „Hard Disk“. Create a new Disk by clicking on the „New“ Button.

In the „New Virtual Hard Disk Wizard“ click next to the „Choose Disk Type“ dialog and go with „Dynamically expanding“.

In the „Specify Name and Location“ Dialog press „Browse…“ and navigate to the „Virtual Hard Disks“ directory of your VM. Then change the Name of the Disk to „Data1.vhdx“.

In the „Configure Disk“ dialog specify the size of the new disk. The Disk must have at least 120 GB but I recommend 200 GB.

Now click „Finish“ and your first disk is created.
To create all four necessary data disks you must repeat the disk creation steps tree more times for the Disk „Data2.vhdx“, „Data3.vhdx“ and „Data4.vhdx“. Finally your „VM Settings“ should look similar to the following screenshot:

Disabling Time Syncronisation
We will configure our own Time Server in the Azure Stack VM so we should turn of time synchronization in the Virtual Machine Integration Services.
Open the „VM Settings“, click on „Integration Services“ and uncheck „Time synchronization“.

Change Automatic Stop Action (optional)
If you don’t have a lot of free disk space on the host you may want to chance the „Automatic Stop Action“ for the Azure Stack VM from the default behavior „Save“ to „Shutdown“. If you do that Hyper-V will not reserve the size of the VMs memory in the „.BIN“ configuration file.

Enable Nested Virtualization
To deploy Azure Stack in a virtual machine we must enable Nested Virtualization for that virtual machine. To do that execute the following PowerShell CmdLet on the Hyper-V Hosts:
Set-VMProcessor -VMName AzureStackDevKit -ExposeVirtualizationExtensions $true -Verbose
Set-VMProcessor -VMName AzureStackDevKit -ExposeVirtualizationExtensions $true -Verbose
Enable Mac Address Spoofing
Because our Azure Stack VMs in the Nested VM must communicate with the outside world we enable MAC Address Spoofing. If you can’t do that there is a way to configure an additional NAT Switch for the Azure Stack BGPNAT VM. To do so I encourage you to look at Daniel Neumann’s Blog Running the Azure Stack Development Kit on Azure blog post.
In this post I configure MAC Address Spoofing. To do so we open again the VM Settings of your Azure Stack VM. Click on the small ‚+‘-Symbol next to Network Adapter. Then click on „Advanced Features“ and in the right windows click in the checkbox next to „Enable MAC address spoofing“.

Close the VM Settings dialog by clicking on the „OK“ button.
Change VM Boot Order
Open the VM Settings click on „Firmware“ and move the „CloudBuilder.vhdx“ entry to the first position by clicking on „Move Up“.

Then click the „OK“ button.
Change Settings in the AzureStack VM
Now we continue the configuration inside the VM. Open a connection to the VM by clicking on the AzureStackDevKit VM in „Hyper-V Manager“. Start the VM and go through the Setup process (choosing the Language, enter a Product key or skip this by pressing the „Do this later“ link, Accept the EULA, choosing a password and finally login-in).
Change the Network Settings
In the VM we must configure the network, so that it works with the NAT Switch. To do so open the „Network Settings“ by right click on the Network symbol in the taskbar and clicking on „Open Network and Sharing Center“.

Click on the „Ethernet“ Connections, click on the „Properties“ button and navigate to the „Internet Protocol Version 4 (TCP/IPv4) Properties“ dialog (like you see in the screenshot below) and configure the IP settings to:
IP address: 172.16.0.2Subnet mask : 255.255.0.0Default gateway: 172.16.0.1Prefered DNS server: 8.8.8.8Alternate DNS server: 8.8.4.4

Test the IP Configuration (DNS and conectivity) by opening a PowerShell and ping www.microsoft.com.

Modify the VM Name (optional)
If you like you can change the Name of the Azure Stack VM. To do so you open the „Server Manager“ and switch to „Local Server“. Then click on the actual Name right to „Computer name“. In the „System Properties“ dialog click on „Change…“. Enter a Name in the “Computer name:“ text field that describe the Computer better than the self-generated name.

Modify the IE Security Settings
To change the IE Security setting open „Server Manager“ and switch to „Local Server“. Then click on „IE Enhanced Security Configuration“. In the „Internet Explorer Enhanced Security Configuration“ and change the „Administrators:“ and „Users:“ Settings to „Off“

Installing Azure Stack
Collect Deployment Parameter
We are nearly ready to kick of the Azure Stack installation with the following PowerShell script.
./InstallAzureStackPOC.ps1 -InfraAzureDirectoryTenantName xxx.onmicrosoft.com -NATIPv4Subnet 172.16.0.0/24 -NATIPv4Address 172.16.0.3 -NATIPv4DefaultGateway 172.16.0.1 -TimeServer xxx.xxx.xxx.xxx -Verbose
But first we need to substitute the „xxx“ placeholders with our deployment values.
Azure Active Directory Tenant Name
You can deploy Azure Stack in two different scenarios: the Connected one and the Disconnected one. The Connected scenario offers more possibility so we use this one. Therefor we need an Azure Subscription and an Azure Active Directory account. If you don’t have an Azure Subscription you can get a free Test Subscription here: https://azure.microsoft.com/en-us/free/
In the PowerShell Script that we will use we need the Azure Directory Tenant Name. I use in the Installation my admin@RitsASTPoC.onmicrosoft.com Account. Here the Azure Directory Tenant Name is everything behind the @. So in my example it is RitsASTPoC.onmicrosoft.com.
https://azure.microsoft.com/en-us/free/
Time Server IP Address
To install Azure Stack with PowerShell we also must specify an Time Server. To get one you have many possibilities. I like the Ntp Pool Project. Choose one that is near your deployment for example if you are in Germany you use an IP of de.pool.ntp.org or if you are in the US you use an IP of us.pool.ntp.org. I use „nslookup de.pool.ntp.org“ and take the first IP Address that is returned (in this example it was 213.209.209.45).

Deploy with the PowerShell Script
Now we are ready to kick off the deployment. To do so open PowerShell and change the Working directory to C:/CloudDeployment/Setup.
Start the Installation with the following PowerShell Script (change your Azure Directory Tenant Name and your Time Server)
./InstallAzureStackPOC.ps1 -InfraAzureDirectoryTenantName RitsASTPoC.onmicrosoft.com -NATIPv4Subnet 172.16.0.0/24 -NATIPv4Address 172.16.0.3 -NATIPv4DefaultGateway 172.16.0.1 -TimeServer 213.209.209.45 -Verbose
Enter the Local Admin Password of your Azure Stack virtual machine.

The Installation starts and after some tests you must enter a AAD Account for the Installation as you see in the Screenshot below (In my case it would be admin@RitsASTPoC.onmicrosoft.com).

Now the installation process will run for 4 to 5 hours. After that you should see an output like the screenshot below.

In Case of Errors
If something went wrong and the installation stops with some errors you can restart the installation with the following PowerShell Command:
./InstallAzureStackPOC.ps1 -rerun
Check Installation
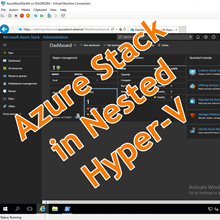
To check if the installation was successful start the Azure Stack Admin Portal. You can do that by open the Internet Explorer and browse to the „https://adminportal.local.azurestack.external“ URL.

If the Browers open the portal everything should work as planned.
Have fun playing with Azure Stack.
What do you think about the Article? Do you have questions? Please leave a comment below.